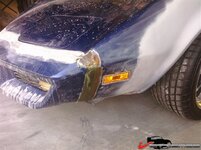
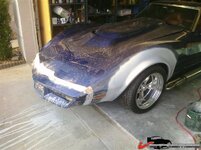
front flares and grilles - louvers -- project finally started

VetteMod - Corvette Restoration, Modding & Performance Forum

Help Support VetteMod Forum:

MYBAD79

Moderator
Joined
Mar 23, 2008
Messages
6,942
Reaction score
5
City & State/Province
sunny Florida
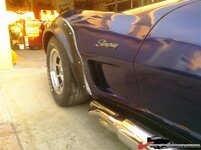
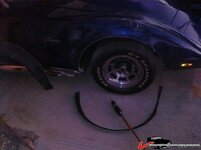
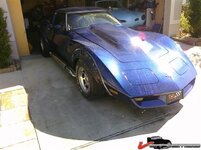
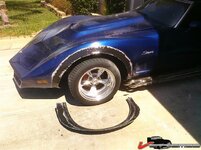
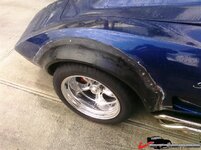
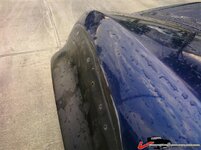
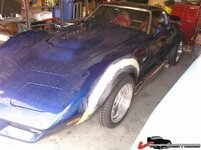
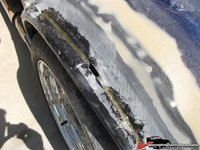
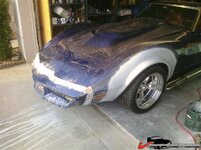
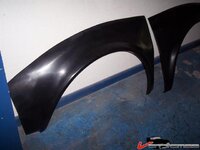
I finally started on my front flare installation. Here are the flares as I received them from Vanacor, these are the 1.5" wide L88 flares for the front to match the 2" wide flares on the rear.... no more mudflap... :waxer:
214d421f4f30c58.jpg

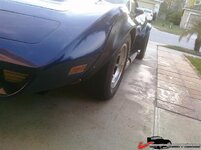
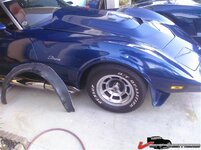
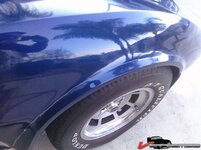
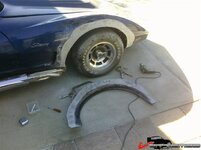
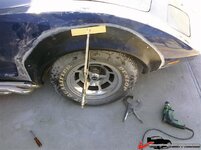
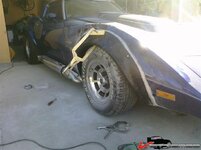
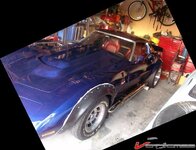
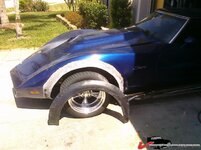
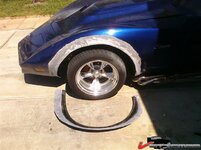
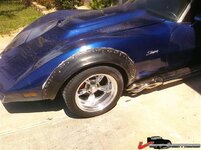
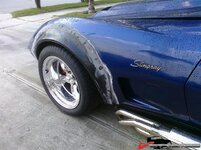
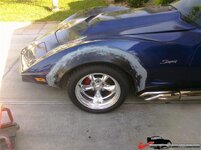
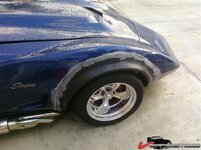
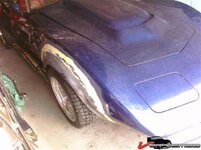
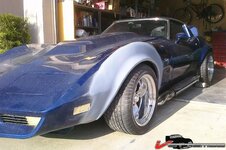
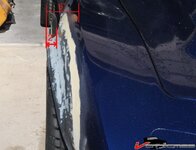
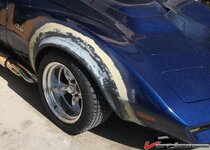
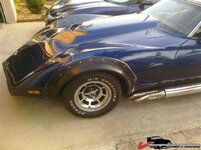
These are photos of todays first "test fitting" after I cut the stock '79 fender lip and mudflare off.
214d421f5024902.jpg
.
214d421f51556fd.jpg
.
214d421f521fad0.jpg

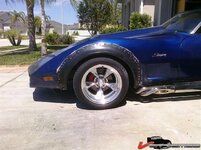
The fit is as good as the rear flares, I am actually positively surprised with the quality and fit... like with all fiberglass pieces, some cutting and fitting is required..... it's not a simple 'bolt on' or 'glue on' job.... if you want to get this to fit and look perfect then it takes some work. I have already worked on this for four hours today and I am nowhere near ready for adhesive... and I only did one side so far.... :rain:
 
Looks great! I'm looking forward to more pictures as things progress.

(Side note: Karsten, I got the '79 driver's seat mounted in my car the other day. Between the new brackets I welded up and the lighter seat weight I saved about 15 pounds off the car. Now I just need to get the car back on the road to see how comfortable the seat is and if my helmet will still fit under the roof.)
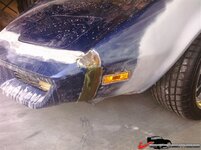
 
Made a little progress on the passenger side today. As you can tell by the photos it got dark ... more tomorrow....


214d4357fec01e2.jpg

.

214d4357ff86193.jpg
.
.
214d4357ffdb05b.jpg
.

Mike, the seat is more comfy than the older style (so I heard)... my only problem with these seats was that there is no headrest, my head would hit the plastic bucket... obviously not an issue if you're wearing a helmet :D
 
Karsten, that's really gonna look good when your done, it'll balance nicely with the rear...are you going with the same blue paint when youre done, or are you gonna do new paint too?
 
more progress... I managed to get the passenger side flare on the fender. This is a lot of work and it is quiet dusty :smash::smash:

214d44b958a3951.jpg
.

Glad that I bought these Harbor Freight clamps when they were on sale :)

.
214d44b9590c36b.jpg

.
214d44b9596b6de.jpg
.

both sides are now held in place with self tapping screws. It takes a little more grinding and fitting and then I'll glue them in place.

214d44b959c5c4b.jpg
.

Is one cartridge 3M 8116 going to be enough for both flares ?? :confused2::confused2:
I would hate having to buy another cartridge, this stuff is expensive :surrender:
 
...are you going with the same blue paint when youre done, or are you gonna do new paint too?

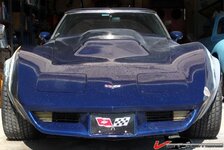
same blue paint. I have a few repairs on the front bumper so I'll paint the entire front surround. Hopefully the paint matches.... these blue flakes are going to be a pain.
 
As an Amazon Associate we earn from qualifying purchases. Product prices and availability are accurate as of the date/time indicated and are subject to change.
...are you going with the same blue paint when youre done, or are you gonna do new paint too?

same blue paint. I have a few repairs on the front bumper so I'll paint the entire front surround. Hopefully the paint matches.... these blue flakes are going to be a pain.

Blend should be your magic work with this project. Paint only what needs paint on the front surround then blend it in and clear the whole surround. That way you won't have to worry about it matching so much.
 
MYBAD79;79967 same blue paint. I have a few repairs on the front bumper so I'll paint the entire front surround. Hopefully the paint matches.... these blue flakes are going to be a pain.[/QUOTE said:
Kinda what I was thinking, those flakes look great, but they're pretty big, I'm sure it'll turn out great, those flares really work!!
 
, those flakes look great, but they're pretty big,

well.... back in 2006 I painted the car in the shade and I did not see well enough how much flake I added... i kept spraying another coat with the flakes then covered everything with 4 coats clear.... THEN I got the car out in the sun :amazed::shocking::eek::eek:
 
, those flakes look great, but they're pretty big,

well.... back in 2006 I painted the car in the shade and I did not see well enough how much flake I added... i kept spraying another coat with the flakes then covered everything with 4 coats clear.... THEN I got the car out in the sun :amazed::shocking::eek::eek:

so your car has that flakey look to it??? :harhar::trumpet::thumbs:
 
well.... I just ordered another 200ml cartridge 3M 8116 adhesive just to be safe.... fortunately I have almost 1qt Evercoat SMC adhesive/filler so that should be more than enough for both fenders and the bumper repairs.

I just hope that 3M glue is as good as everybody says.... for both fenders that's $80 just for the glue.... :huh::huh:
 
Hey Mike..... yes, it's going to look great, just a matter of finding time to work on it... :hissyfit:

I did get quiet a bit done this weekend :

214d8fd7b12e2e8.jpg
.
214d8fd7b1e7b95.jpg
.
.

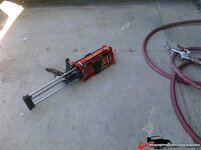
now this 3M adhesive is some serious stuff.... the applicator gun works like a charm.... expensive but worth it :thumbs:

214d8fd7b194b83.jpg

.
 
OK, more photos.....

I applied the 8116 adhesive to both fender and flare. Working time is 90 minutes according to 3M, it's more like 30 minutes in 90 degrees Florida weather :)

214d8fd7b255407.jpg

.

I used many screws to holt it in place:

214d8fd7b2c0ac7.jpg

.

214d8fd7b357b29.jpg

wow, can't wait to get it painted....

.
removed the screws:

214d8fd7b404b23.jpg
.
here you can see how I ground the flare and the fender down for a better transition:

214d8fd7b4728cf.jpg
.
 
I used Evercoat SMC adhesive for the first coat of filler, this way I know it will adhere propely to the SMC fender. Body filler goes on top of that...

214d8fd7b4e06b9.jpg

.
214d8fd7b577705.jpg
.
.
here's the driver side after two coats of Evercoat adhesive, grindind, sanding and one coat body filler....

214d8fd7eebb21b.jpg

..
 
Update:

with smaller tires it would probably not very noticeable but with my 275s up front I want it perfect: the driver side flare is wider than the passenger side, had to cut and spread it 3/8" ... took numerous measurements to VERIFY before I made the cut....
.
214db21ff64236c.jpg

.
214db21ff70ef22.jpg

from the upper fender edge it 6" to the outboard fender edge and from the curved section out it's 2" - before the cut it was only 1 5/8" and 5 5/8" on the passenger side.

It's done: now it's the same left and right. Now I have to grind inside the fenders and lay some glass in there... this is going to be fun....

214db21ff6ada28.jpg
.

.
 
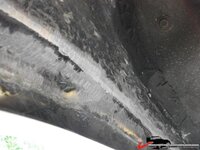
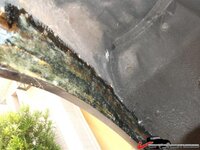
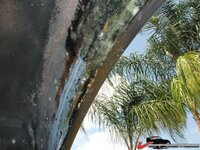
I spent quiet some time inside my front fenders and ground down the transition from fender to flare, filled the remaining small gap with SMC adhesive, then glassed it in with two layers of fiberglass.... I don't think I have to point out how crappy this job is. I hope I never have to do this again.

214db624cdb0b45.jpg
.
214db624ce47b94.jpg
.
214db624cedca70.jpg
.

More sanding and filling/priming the outside is next....
 
Sucks to pay good money for a product and have it be of poor quality. Did Vanacor contract out their products to the Chinese?
 
3/8" is quiet a bit but at least it was simple to fix.... I'm glad I got these flares to match my rear fenders. I only bought the rears and then Vanacor went out of business so I had mismatching front/rear fenders.
 
OK, made some more progress and sprayed another coat of urethane high build primer on the fenders.... getting close to being acceptable :D

While I was at it..... I decided to grind out all the filler on the bumper seam and re-do it with Evercoat SMC adhesive and fiberglass mat....

214dbf603025926.jpg

on the sides I used fiberglass mat and epoxy resin .... Good thing the SMC adhesive is good for both fiberglass and SMC.... same for the 3M 8116 adhesive, SMC or fiberglass.... after using it for the first time I think it's good enough to glue a dollar bill to the moon... holy crap, this stuff is worth the money....

214dbf60310ab9a.jpg

stay tuned.... :clap:
 
OK, made some more progress and sprayed another coat of urethane high build primer on the fenders.... getting close to being acceptable :D

While I was at it..... I decided to grind out all the filler on the bumper seam and re-do it with Evercoat SMC adhesive and fiberglass mat....

214dbf603025926.jpg

on the sides I used fiberglass mat and epoxy resin .... Good thing the SMC adhesive is good for both fiberglass and SMC.... same for the 3M 8116 adhesive, SMC or fiberglass.... after using it for the first time I think it's good enough to glue a dollar bill to the moon... holy crap, this stuff is worth the money....

214dbf60310ab9a.jpg

stay tuned.... :clap:
Watch out, I'm sensing a case of acute WhileImAtItis.
 
Watch out, I'm sensing a case of acute WhileImAtItis.

I know..... haven't decided on the side markers yet.... they might go bye bye..... :idea:
SLIPERY SLOPE:
Oh yeah, then, maybe the headlights - flush mount/recessed, covered - or in the grill. Ohh, oh and maybe, Halo- or projector lamps. And...that splitter idea I was thinking about, and...and...
Bound by the "links in the chain..."

Looking very nice, however!

Cheers - Jim
 
Looking nice.....I know partly how you're feeling. I added the patch panels to my 79 for the 80-82 front end. Not exactly a fun job, but I'm sure I saved a lot of money doing it myself rather than having a body guy do it. Getting the inside fo the fenders really suck!

On the subject of Vanacor, did you not like the quality of the product they sent you? My patch panels were extrememly thin, to the point of seeing my hand behind the panel after I finished glassing them in and filling in the seems. I find it hard to believe that I sanded on them that much to just about sanding through them. They did line up with the ecklers front 80-82 bumper pretty well. I did end up putting a lot of layers on the back just to strengthen them.

Subscribing to the thread because I want to see it finished up. Wheels look nice too!
 
Back
Top