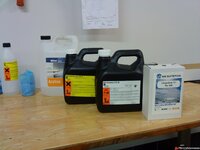
1969 427 restoration from Sweden

Again, very nice work. I look forward to your posts.

Your shop looks as clean as a hospital room! Mine looks like a long abandoned warehouse (full of junk) :eek:

Again, very nice work. I look forward to your posts.

I agree. Nice job.

DC

This is some fantastic work...you have some skills! Keep it coming!
Glad that you find this renovation interesting. :cool:
There is nothing revolutionary about it I think, it will be a standard 69 Corvette on the outside but with a nice finish on the inside. Hopefully I will be able to add som go fast stuff to to my engine in the future.

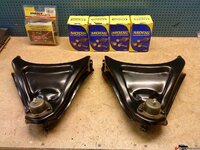
Just wanted to make a comment to the Moog parts. I was very keen to get made in the USA Moog parts. When I recieved the boxes with the upper and lower ball joints they all looked the same on the outside. I was quite surprised when I found 1 lower joint that was completely different from the other. Different housing, much weeker and a general feeling of a low quality part:crap:
Refused to accept it and my parts dealer exchanged it for a new correct unit. I suppose things are different theese days, even with "quality" parts...

18774ee91308d8aba.jpg
 
Finally the finished frame and front suspension. I am still missing my rear axle. The posi unit was cracked ( not unusual) and it is currently beeing restored with a polished posi and better stuff on the inside. This is beeing performed by one of Swedens best guys on this. He has built many race winning rear axles and he gets his stuff from Tom.

18774ee91309a696b.jpg
 
Did some work on different parts during this autumn.
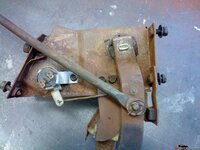
Completely restored the steering column. Many parts cramped in a small space. Not easy work I think.

18774ee9130a4b048.jpg

18774ee9130af0866.jpg

18774ee9136a016b1.jpg
 
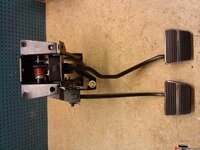
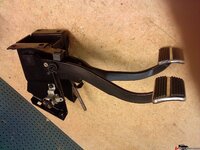
Also did some work on my pedals. New rubber and chrome, sand blasting and a bit of semi gloss black paint. The new plastic bushings were crap.
Threw them away and reused the old ones that was tighter than the new parts. I´m getting sooooo tired of new parts not having even barely acceptable quality.

18774ee12eef2ec20.jpg

18774ee12eefd2d3c.jpg

18774ee12ef080cb3.jpg
 
The last photos brings my renovation to it´s current status.
I started this work in the end of January 2011 so I think I have been working pretty hard.

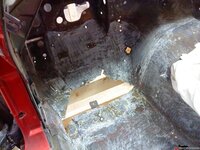
Currently all my time is put into the body. It is in fairly good condition apart from the coupe. Cracks and holes in the floor boards and a 12"x 8" hole in the drivers side floor under the pedals... I have removed all paint on the inside and in the engine compartment (protective clothes, mask and my welding smoke fan at full speed, asbestos...). I am just about to start laying Epoxy and woven mats inside the complet coupe area.
No pictures on this now, I will get back later when the work has come a bit further.
 
Glad that you find this renovation interesting. :cool:
There is nothing revolutionary about it I think, it will be a standard 69 Corvette on the outside but with a nice finish on the inside. Hopefully I will be able to add some go fast stuff to to my engine in the future.

No nothing revolutionary - just exquisite detail and workmanship! :1st: I'm really enjoying this thread. So how come its seems to be only the guys across the pond that pull off these well engineered, tasteful builds?:(
 
Was wondering if you could give me a frame measurement from behind the motor mounts inside of frame rail to inside of frame rail and a same measurement just in front of the motor mounts.

18774ee7c7ecafb46.jpg[/QUOTE]
 
Ok, frame measurements for JeffP1167:
Distance between inside of frame right behind the engine beams: 725mm which eaquals 28.5".
In front of the beams, if I measure exactly below the washers for the upper cross shafts: 675mm, 26,6".

Hope this will be of some help to you!
 
Hi all,

Been away for a while. Busy working on the Corvette... My internet connection has also been down for 2 weeks since the last storm. One good thing about that is I have not wasted time staring at the screen drooling at all nice Corvette builds:lol:

Anyway, had my carburator restored by a guy here in Sweden. He is a master on Rochester quadrajets and well known for his builds for dragrace cars as well as original cars.

Unfortunately my carburator was not the original unit. And, it was not even set up for my 427 engine. It also had alot of wrong parts and incorrectly assembled parts...

This is his findings, translated by me, so please have some mercy on my translation, alot of difficult words for a Swede involved here..

"Application number 7029207 says that it is supposed to be assembled to a 1969 Chevy 325Hp 350Cui V8. It was manufactured day 24 1975 and this makes it a Service Replacement unit for this engine.

During disassembly I noticed following:
The cover over the float housing ventilation incorrectly assembled.
Secondary throttle blades opening too much caused by a faulty linkage.
Dampening spring for the primary needles incorrectly assembled. This prevented the movement of the needles.
A pipe for the secondary acceleration pump was loose at the drivers side.
A clip for the intake valve incorrectly assembled causing a risk for fuel leakage.
Throttle bushings worn.
Main jetting too lean for a big block.

All faults above corrected.
New bushings for throttle shafts assembled.
Main Jetting changed.
Acceleration pump rubber changed to ethanol resistent material.
Recalibrated the Idle circuit for your big block specification."


The Carburator looks almost like new and I´m very pleased to have a Rochester 4MV on my 427 engine.
Here it is on my original aluminum intake, glass blasted.

18774f0b5cf7780d8.jpg

18774f0b5cf8ca4f4.jpg
 
Last edited:
Have put some work on my ( well, the Corvette´s) body now.
Started by washing it all with a high pressure washer. Then allowed it to dry in my workshop for a week or so with a heating fan blowing hot air over it.

18774f0b5cfa27b6a.jpg
 
Last edited:
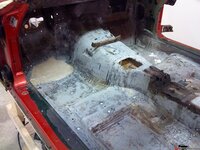
Then it was time to remove all paint and other nasty stuff on the inside of the body. A lot of cracks and holes all over the floors was present. The connections in the floor for the drivers side seat was all completely cracked! What a suprise to fall through the floor while driving:crutches:

Photo shows the large hole at the drivers side. I wonder what has happened here?

18774f0b5cfb6dc36.jpg
 
Everything grinded with 80 grit sand paper and thoroughly washed with Acetone. As may be seen, the first layers of woven glass fibre mat has been fixed in forward section and also at the seat connections.
Im using a very flexible woven mat that forms around every corner and bend without making bubbles or sharp edges. I use Epoxy resin for all of this work.

18774f0b69d84de60.jpg

18774f0b5cfcb6ff5.jpg
 
Last edited:
Check where the transmission tunnel joins the firewall. There is a sharp transition there and the join will usually crack. It does not open a gap so you can't see it. Mine discovered mine was cracked when I was scraping glue with a knife and went right through.
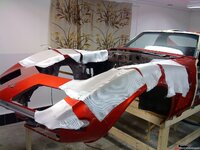
 
Check where the transmission tunnel joins the firewall. There is a sharp transition there and the join will usually crack. It does not open a gap so you can't see it. Mine discovered mine was cracked when I was scraping glue with a knife and went right through.

Fortunately that connection was ok. I have thoroughly looked on all joints and I have found a few separated. Especially at the lower parts of the fenders where they connect to the wheel housings. Have glued it all back together with the Epoxy. Mixed a speciall substance in to the Epoxy that makes it thicker so that it stays in place!

Anyway, thanks for the tip BBShark!
 
I precut all mats before mixing Epoxy. No time to do this when the epoxy is mixed... Only mixed a small quantity of Epoxy at a time.

Put down 2 layers of glass fibre weave, doing one side at a time. Finished with 1 layer of carbon fibre weave. Just to give it all some extra strength:D

Of course all hardened Epoxy was washed with a citrus (!) mixture to remove remains of resin that forms on epoxy during the hardening process. (this was recommended by the epoxy manufacturer).
Sanded all surfaces where new weave meets old weave as well, before starting on the other side.
Has not finished the tunnel and passenger side on the last photo.

I will willingly admit that this work is not particularly beautiful... but, it really seems to give the inside of the car a more stable feeling, almost like sheet metal!

18774f0b5cfc190ac.jpg

18774f0b5d92ea9d5.jpg

18774f0b5cfd6a93b.jpg
 
Last edited:
Finally got started on the paint prep work. I will paint the complete under side and engine compartment.
Grueling work, laying on the garage floor sanding the bottom of the chassie...

A few photos of the engine compartment.
18774f253afb2fd7f.jpg

18774f253afbd8867.jpg

18774f253afc838b7.jpg
 
Top