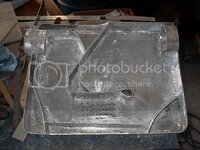
Starting on the muffler fabrication.

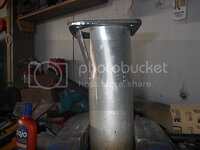
Got started on some of the build. Nobody (that I'm aware of) makes reducer flanges for my headers so I cut some out of quarter inch steel. (After playing around lately with some aluminum projects I'm grossed out on how much steel weighs.)
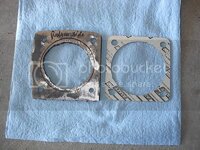
IM001739.jpg

I struck out finding a muffler shop that can expand some exhaust tubing into a cone shape (from 3" to 3.5") for the reducer, so I've got to make my own reducer. As it turns out I think the pipes will package better if I make an offset reducer to drop the pipes a bit down from the floorpan. The pipes will still be a touch higher than the collector flange.
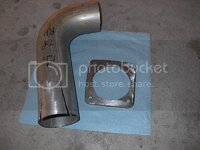
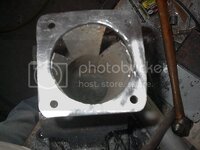
IM001741.jpg

IM001742.jpg

IM001744.jpg

I'll make a couple tack welds to check the fit, and then make some pie shaped pieces to fill in the reducer shape.
 
wow, this is a fun project :D

did you use aluminum or steel rivets ???

All I had on hand was aluminum rivets. I realize they're not as strong as steel rivets, and have a higher expansion coefficient, but I thought they'd be good enough for this function. Obviously I was wrong. :censored:

On the drive home from the track it occurred to me that I should have added a half dozen short weld beads around the cover periphery to hold the cover on, and just relied on the rivets to help with the gas seal.

(As I've mentioned before, I'm just a double E and actually have no business messing with this mechanical stuff. :wink: )
 
Obviously I was wrong. :censored:

:lol:

sounds very familiar...... been there many times ....

I would think vibration killed the rivets, not necessarily temperature... once the rivets are loose and don't make good contact to the shell of the muffler anymore they'll snap....
 
Last edited:
Made a little progress today. I'm constantly reminded that while I might be marginally competent enough to do this kind of stuff, I'm nowhere good enough to do it fast enough to make a living doing it. :amused:

I lucked out on one item. I found that a couple of sliced pieces of 3" PVC is just the perfect size to center and hold the pipe section in the crossmember while I tacked the pieces together.

IM001748.jpg

The left side should go a little quicker as the bend/offset is a little smaller.

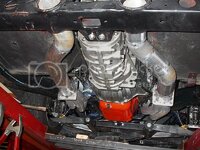
I'm trying to decide if it's worthwhile to add a small crossover between the reducers. I can package a 1 1/2 or 2" tube between the bellhousing and transmission case front edge. My main interest is a slight pressure equalization and noise reduction versus any noticeable power increase.
 
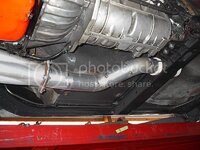
Fimally got the car fired up again after a few months of storage. Got all the exhaust welded up and installed last week. Here's the 3" pipes during fabrication that replace the 2.5" pipes I've had forever.

IM001750.jpg

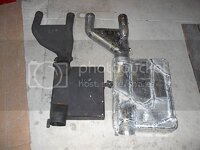
I made a new junction/surge volume pipe similar to the old piece (including the fitting for a WBO2 sensor or pressure gauge line), and the new muffler to replace the previous steel one. I was going to just duplicate the size of the old one, but I ended up using the full size of the sheet aluminum piece I had, and ended up with about 40% more muffler volume.

IM001799.jpg

After my experience with the top flexing on the old muffler I decided to weld each individual cavity cover to the internal walls, hence the jigsaw puzzle appearance. The old muffler was lined with fiberglass strand, but this muffler is lined with expansion volume chambers. I sprayed the internal volume with VHT ceramic paint to add a thermal impedance between the exhaust gas and the aluminum. I thought it was a pretty good idea until I welded the cavity covers on, and then the paint smell was a bit rough on the sinuses.

The exhaust sounds pretty decent under light loads. I'm reasonably happy with it. However, we'll see what the WOT volume level is next spring. If I'm not happy with that I can make a couple cuts in the exterior walls and install some fiberglass in the chambers. One area I have to tweak is a spot where I'm getting some leakage at the pipe slip joint that connects the left S bend feeding the junction pipe.

All in all the system change lost 2 net pounds. The three inch pipes were a touch heavier than the 2.5" pipes, but the muffler and junction pieces were lighter. I put a coat of flat black barbeque paint on the system to make it blend in better with the underside of the car.
 
Didn't you have some perforated sheet for the walls in the old muffler? Is the internal volume of the new muffler all active (ie. the entire volume of the "box" is in the flowpath)? Not sure I'm explaining this correctly.
 
There's both passageways and surge pressure areas (or volumes, to be more accurate) distributed in the box. The flow enters from the top right and exits at the top left, which pretty much dictated where I could place the runners and surge volumes. The upper right quadrant is the first expansion volume, and then the flow makes a clockwise movement towards the outlet. I drilled about a hundred holes in the interior walls to allow some flow (and pressure) movement between chambers and the inlet/exit ports. As I mentioned earlier, much of the perimeter area is dedicated to surge volume compartments.

IM001782.jpg

I tried to position the interior walls to prevent any two surfaces from being parallel to reduce standing waves, although the horizontal surfaces are painfully parallel with the exception of the inlet/outlet ramped surfaces. My hope was/is that the individual covers will be stiff enough to not vibrate at lower frequencies. I put several short welds on the vertical surfaces to anchor them to the floor (I ended up stickwelding the majority of the internal beads due to the tight areas needing welds, and the ease and speed of that). The outside welds were TIG welded. Due to the issue I had with one of the argon tanks I ended up grinding out several external weld areas and redoing them. There were definitely times I wasn't enjoying the TIG experience.

I aimed my IR gun at the muffler yesterday while the engine was running. At idle the muffler was about 130 degrees F(ambient temperature of 60 degrees F). I attribute this to the gasses expanding in the muffler volume, and the large surface area of the box (Hopefully the VHT paint on the internal surfaces was helping some also). I'm hoping at WOT that I'll be able to keep the muffler temps below 500 degrees. The movement of air under the car should also help.
 
Had the opportunity to try out the new muffler. I went to a T&T day at Mid-America Motorplex in southwest Iowa yesterday. Ninety degree ambient temps, but the engine coolant stayed around 210* F max, despite my having blocked off the two front outer grills last year.

IM001960.jpg

The car ran great (to my relief), with only a couple minor issues. After I got back in from the second session I did my usual check to see if anything was leaking under the hood (or ready to fall off), and everything looked normal with the car. I went and got a cold drink and came back a couple minutes later I heard this loud whooshing sound. WTH? I walked up to the car (expecting to find a split heater hose or radiator hose) and found that the LF tire valve stem had ruptured, and the tire was going flat fast. I don't know if the stem was defective or if I damaged it when I mounted the tires. Whatever the cause, the problem waited to show up until after a couple sessions. I didn't have a spare Nitto tire, so I pulled all four off (along with the adapters) and installed a set of well used 15" Hoosiers to finish the day.
The other nagging issue was the throttle kept hanging up, and the idle RPM would stick at 1200-1500 RPM at times. It appears to be the primary blades (I verified it wasn't the secondaries) despite having two return springs (in addition to the built-in coil spring on the throttle shaft. Blipping the throttle brings the RPM back down. I have the base gasket cut bigger than the outline of the throttle blade area, so I don't believe there's hangup in that area, but I'm going to pull the carb and check anyway.
The muffler seemed to hold up fine (I didn't see any aluminum droplets stuck to the rear bumpers or anything). The exhaust note had much more high frequency content than the previous mufflers I've had on the car (I don't know if that is primarily a function of the present muffler's modest vertical thickness). It certainly wasn't as sweet as a 12 cylinder Ferrari, but pleasant. I was also pleased with how quiet the exhaust was at 100 mph "cruise" condition. I did a few laps at 80% speed to minimize braking time and focusing on getting smooth through the lines. The car was quiet and pleasant when out of WOT conditions.
Separate thread to follow: The Porsche GT3RS in the far background.
 
I wish you could put a camcorder in so i could ride with you.

I don't know what the deal is with valve stems these days. I did some research and it seems the standard ones are made in china. I've had a couple fail over the past 2-3 years. You can get a kit for $30 to change a standard stem without dismounting the tire. Theres a thread on it i started.http://www.vettemod.com/forum/showthread.php?t=8070

There is a breakaway stem (surevalve) http://www.hcwsinc.com/faqs.htm and then there are those that bolt on from the backside ( dismount required for those)

I believe the breakaway valve is really an off roading thing where the wheel is in muck, weeds and brush. I don't know it it will help on a roadcourse.

I believe you would have felt the tire going down and been OK but feel very lucky it decided to leak out in the pits just in case!!!
 
Last edited:
I wish you could put a camcorder in so i could ride with you.

I don't know what the deal is with valve stems these days. I did some research and it seems the standard ones are made in china. I've had a couple fail over the past 2-3 years. You can get a kit for $30 to change a standard stem without dismounting the tire. Theres a thread on it i started.http://www.vettemod.com/forum/showthread.php?t=8070

There is a breakaway stem (surevalve) http://www.hcwsinc.com/faqs.htm and then there are those that bolt on from the backside ( dismount required for those)

I believe the breakaway valve is really an off roading thing where the wheel is in muck, weeds and brush. I don't know it it will help on a roadcourse.

I believe you would have felt the tire going down and been OK but feel very lucky it decided to leak out in the pits just in case!!!

A camcorder is on my short list this season. I typically go to the track by myself, so there's rarely anyone there to take track pictures for me. (I did see a photographer taking pictures at the track, but he didn't hand out any cards. Perhaps I'll have to check the track website to see if I can find out anything.)
I'm not an expert on cameras, so I'm still trying to figure out what's a decent buy.
 
(I did see a photographer taking pictures at the track, but he didn't hand out any cards. Perhaps I'll have to check the track website to see if I can find out anything.)
I'm not an expert on cameras, so I'm still trying to figure out what's a decent buy.

I've had this done several times and it was around $50 or less. You get a lot of good info from still picts to see what the camber is doing, how the car is rolling, if the tire is rolling, if you're driving the right line, etc.
 
I don't know what the deal is with valve stems these days. I did some research and it seems the standard ones are made in china. I've had a couple fail over the past 2-3 years.

Chinese Valve Stem Warning Could Affect Everyone Who's Had Tires Replaced Since 2006
http://jalopnik.com/5045535/chinese...t-everyone-whos-had-tires-replaced-since-2006

I've always been scared of Chinese stuff for any critical function (tires, brakes, etc) and have done my best to avoid them. I broke the tire down and pulled out the stem base. As on the rest of my tire valve stock this one is marked Germany. I have no evidence that these are/were defective, and I'm not discounting the possibility that I damaged it when the (very stiff) sidewall was slipped over the rim. I've installed hundreds of valve stems during and since my teenage years working at the gas station, but there's still the chance that this tire/rim combination just bit me in the ass in the process. I put a new stem in, and hopefully this issue is fixed.
 
. As on the rest of my tire valve stock this one is marked Germany. .

Where to get those? I just replaced a slow leaking one with my quick change setup and it worked pisser.

IIRC, I bought a bag of them at a swap meet a few years ago (I don't remember if it was in Indiana or Florida). I'm down to about three left, so I need to put this on my restock list. (I won't be terribly surprised if I'm out of luck finding any more made in a first world country.)
 
Top