You are using an out of date browser. It may not display this or other websites correctly.
You should upgrade or use an alternative browser.
You should upgrade or use an alternative browser.
Old Project Revitalized - 56 Track Car
- Thread starter mfain
- Start date
SuperBuickGuy
Well-known member
shock reservoir.
I've used PS coolers on 4x4s, but never on a car....I'm learnin'
mfain
Well-known member
mfain
Well-known member
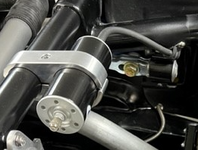
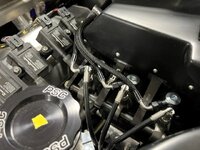
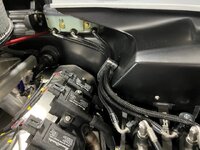
Thought some of you might be interested in how to plumb Tilton 78-series master cylinders. Because they pivot at the front (to keep the pedal-to-cylinder shaft perfectly aligned), they cannot be plumbed with hard lines. You need flexible lines from the reservoir to the cylinders, and from the cylinders to bulkhead fittings where you pick up the hard lines. Brown and Miller (BMRS) built these for me.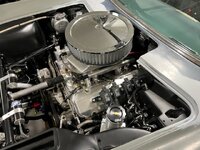


SuperBuickGuy
Well-known member
If I ever get my rebuilt rack, I'll add a cooler. I plan on putting the rear diff cooler on when I do the gear swap...
I really like the lines I made for my hydroboost - they went together very easily, and now 2 years in, are leak free.
I really like the lines I made for my hydroboost - they went together very easily, and now 2 years in, are leak free.
bobs77vet
Well-known member
wow thats very nice!!!
mfain
Well-known member
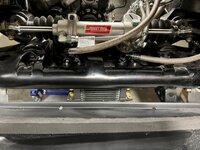
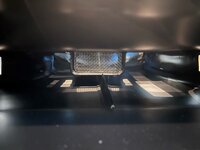
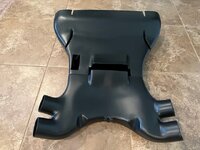
Here is the finished carbon fiber duct work that connects the center opening in the air dam to the 4X3" brake cooling hoses that are directed at the caliper and center of the brake rotor hat. In the center is a diffuser and outlet nozzle for the small Setrab power steering cooler. Working on the front splitter/undertray with diffuser tunnels that will terminate through "barge boards" to direct the airflow out the back of the wheel well and down the outboard diffuser tunnels. One project after another....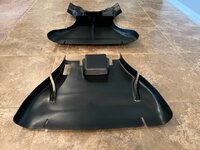


rtj
Well-known member
- Joined
- Nov 5, 2011
- Messages
- 2,963
It sure looks like you have perfected the technique.
Do you make a part like that over foam and cut it apart? i need to figure out how to do this.
That is really nice.
That is really nice.
mfain
Well-known member
Look at posts 176, 180, and 184. I build a buck out of wood, cardboard, tape, foam, and whatever, then cover that with fiberglass and sand smooth. Then I pull molds off of the buck, cutting them apart where necessary to get them off the buck. Finally I pull the CF parts out of the molds and bond them together where necessary. Not a hard process, but a little time consuming. Hope this helps.Do you make a part like that over foam and cut it apart? i need to figure out how to do this.
That is really nice.
bobs77vet
Well-known member
I want to do that for fun, it looks awesome
SuperBuickGuy
Well-known member
this is akin to Michael Jordon saying "well, I just play basketball"... you are way too modest, that looks amazing.Look at posts 176, 180, and 184. I build a buck out of wood, cardboard, tape, foam, and whatever, then cover that with fiberglass and sand smooth. Then I pull molds off of the buck, cutting them apart where necessary to get them off the buck. Finally I pull the CF parts out of the molds and bond them together where necessary. Not a hard process, but a little time consuming. Hope this helps.
mfain
Well-known member
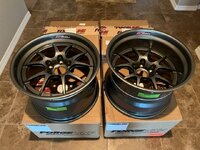
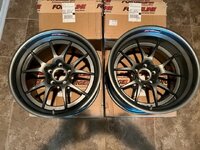
Very nice. How much do they weigh?
SuperBuickGuy
Well-known member
those look awesome. what tire sizes? what tires?
mfain
Well-known member
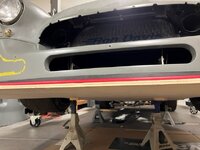
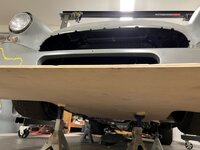
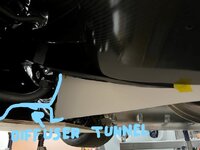
Reference the questions above. I will weight the wheels more accurately, but it looks like almost 23# for the 13X18 and 21+# for the 12X18. I currently have Michelin slicks - 30/65 front and 31/71 rear. That is about the same as 335f/345r. Here are some really early mock-up photos for you engineers to ponder. I am building the front undertray to accommodate a large Viper ACR splitter (TKO Motorsports). The undertray will have 4 tunnels, two of which dump behind the front tire ahead of "barge boards" that will help direct the airflow to the outer diffuser tunnels that run inside the outer rocker panel/side skirt and outboard of the frame rail. The undertray will be Kevlar (on the bottom for scuff protection) and carbon fiber with a foam core.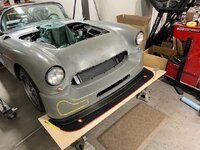


phantomjock
Well-known member
Pappy -
I like it a lot! {You've heard that before...}
Is the red tube an add-on or part of the Viper Splitter?
I like the use of Kevlar on the bottom side. I've used some in my fender build. I am saving the rest for work like yours.
PVC scuff pads maybe? (I hate them for aero reasons if just screwed on - but they can be used to "shape air.")
Cheers - Jim
mfain
Well-known member
Thanks! The splitter is a laminated hard, dense plastic - red in the middle with a 1/8" black upper and lower surface. So, when you shape it, the red will always be visible in the center. We'll see how it holds up. I can always go back to the factory ACR splitter which I know through experience will take quite a beating.Pappy -
I like it a lot! {You've heard that before...}
Is the red tube an add-on or part of the Viper Splitter?
I like the use of Kevlar on the bottom side. I've used some in my fender build. I am saving the rest for work like yours.
PVC scuff pads maybe? (I hate them for aero reasons if just screwed on - but they can be used to "shape air.")
Cheers - Jim
mfain
Well-known member
SuperBuickGuy
Well-known member
as advertised.... love it.

