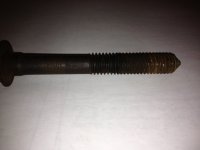
Number 2 and 3 where pretty straight forward. Soaked with PB blaster and used a 15mm socket on one of the bolts and 5/8 on the others. Threads on bolts looked good so the cage nuts should be fine.
Do I need to loosen anything around the rear bumper to lift the body a couple of inches?
Do I need to loosen anything around the rear bumper to lift the body a couple of inches?