DC3
Well-known member
I installed a new stereo system in my '73 last fall and just now got around to dealing with the photos.
I went with a Kenwood X693 Head Unit, Kenwood XR-4S class D 4 channel amp (120 watts per channel), Boston Acoustic S75 4"x6" speakers in the dash, Boston Acoustic SL65 6 1/2" speakers in the kick panels, and a Polk Audio MM840 8" subwoofer. I'm using a 120GB iPod Classic as the main source of music. I ripped the music in Apple's lossless format for best audio quality and I ran the docking cable under the console into the ash tray
I'm using the head unit to drive the dash speakers for fill, using the front 2 channels of the amp for the kick panel speakers and bridging the rear 2 channels of the amp for the subwoofer.
The amp is really too much for the kick panel speakers I selected so I dialed the gain back a bit and have to remember not to crank it all the way. Couldn't find a suitable Class D amp with less wattage and I really needed more for the sub anyway.
All in all I am extremely happy with the way it turned out. The sound is awesome. I can't believe how much bass the 8" Polk sub puts out. Very tight bass without being boomy. It will definitely get your attention.
I've used Boston Acoustic speakers in the past and really love their sound so I was very happy I could make them fit.
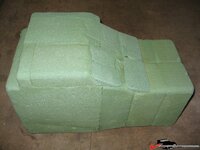
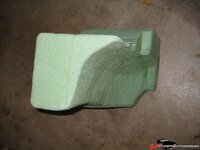
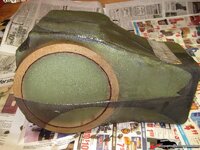
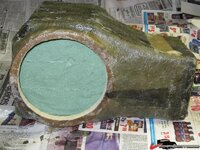
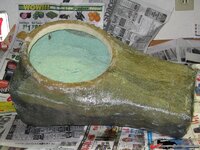
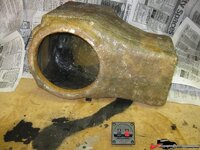
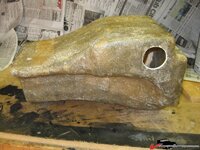
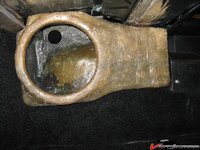
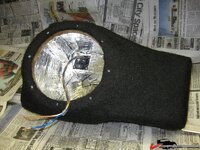
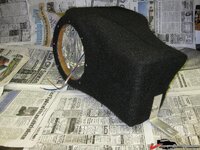
I didn't document the head unit, speaker and amp install with photos since there are plenty of photos on the web for that but I did document how I built the fiberglass subwoofer enclosure.
Here's some pics of the finished install. I'll document the enclosure construction beginning with the next post.
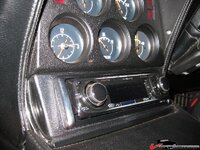
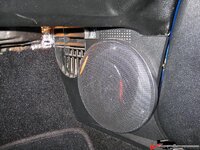
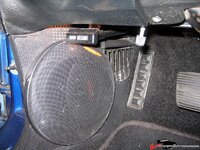
The speaker grills are also designed for the Boston 6 3/4" speakers so they stick out a bit in this installation but I don't mind. Looks fine with the doors closed.
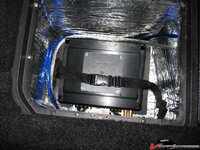
I mounted the amp in the jack compartment and found a smaller jack that I could put in a water proof boat bag and store in the wheel of the spare tire.
Class D amps run very cool compared to other amps so I was not overly concerned with mounting it in an enclosed location. Nevertheless, I decided to give the compartment a bit of added ventilation and used some 2" aluminum soffit vents from Lowes.
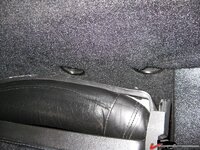
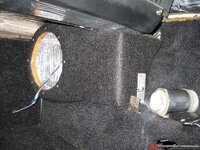
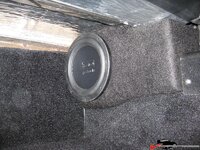
Here's the sub mounted over the driver's side wheel well.
I went with a Kenwood X693 Head Unit, Kenwood XR-4S class D 4 channel amp (120 watts per channel), Boston Acoustic S75 4"x6" speakers in the dash, Boston Acoustic SL65 6 1/2" speakers in the kick panels, and a Polk Audio MM840 8" subwoofer. I'm using a 120GB iPod Classic as the main source of music. I ripped the music in Apple's lossless format for best audio quality and I ran the docking cable under the console into the ash tray
I'm using the head unit to drive the dash speakers for fill, using the front 2 channels of the amp for the kick panel speakers and bridging the rear 2 channels of the amp for the subwoofer.
The amp is really too much for the kick panel speakers I selected so I dialed the gain back a bit and have to remember not to crank it all the way. Couldn't find a suitable Class D amp with less wattage and I really needed more for the sub anyway.
All in all I am extremely happy with the way it turned out. The sound is awesome. I can't believe how much bass the 8" Polk sub puts out. Very tight bass without being boomy. It will definitely get your attention.
I've used Boston Acoustic speakers in the past and really love their sound so I was very happy I could make them fit.
I didn't document the head unit, speaker and amp install with photos since there are plenty of photos on the web for that but I did document how I built the fiberglass subwoofer enclosure.
Here's some pics of the finished install. I'll document the enclosure construction beginning with the next post.


The speaker grills are also designed for the Boston 6 3/4" speakers so they stick out a bit in this installation but I don't mind. Looks fine with the doors closed.

I mounted the amp in the jack compartment and found a smaller jack that I could put in a water proof boat bag and store in the wheel of the spare tire.
Class D amps run very cool compared to other amps so I was not overly concerned with mounting it in an enclosed location. Nevertheless, I decided to give the compartment a bit of added ventilation and used some 2" aluminum soffit vents from Lowes.

Here's the sub mounted over the driver's side wheel well.

Last edited:

