JeffP1167
Well-known member
Since I got suspended at work I decided since I have a nice 5 day weekend to work on this project for my 90 vette. It still needs a lot of work of course but I have a considerable amount of the rough texture grinded down. This project will take quite a lot of work to finish though but when done should really brighten up the underhood appearance of this car.
I am also planning in polishing all the serpentine stuff on the car as well since I have a complete spare serpentine system. I just never have liked the looks of polished runners and plenum and powder coated base manifold. Every possible polished part is rhe only way to go.
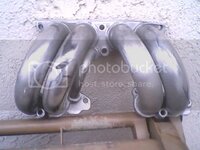
Here is what the intake and runners started out like. GM intakes are somewhat hard to do because of all the tight areas and sharp bends. I will be removing all casting numbers "logo's on the manifold for a cleaner look as well.

I was concerned about the condition of the runners so decided to lightly sand one area on them and see how they turn out. I will also have to buy runner dent removal kit since these have a few dings in them. Here is what the runner turned out like after about 15 minutes of work.

This part of the process is being done with a dremel and stones of various shapes as well as drum rolls. This process is great for removing casting lines and the rough texture of the manifold. At this point once you get the manifold cut down then you can shape and blend areas for a much cleaner look. I don't have a plenum and and fuel rails at this point but will also show you how to do them as well.


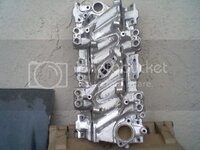
This is a different TPI system I did, however it was never completely finished, but you can see how well they will turn out and the cleaner look without the casting "logos" I even do the bottom of the plenum as well because when the base is polished you will see the ugly bottom of the plenum if it isn't done. To me if every spot isn't done on a TPI it will show on other polished parts and thats why I do all four sides of the plenum.


I am also planning in polishing all the serpentine stuff on the car as well since I have a complete spare serpentine system. I just never have liked the looks of polished runners and plenum and powder coated base manifold. Every possible polished part is rhe only way to go.
Here is what the intake and runners started out like. GM intakes are somewhat hard to do because of all the tight areas and sharp bends. I will be removing all casting numbers "logo's on the manifold for a cleaner look as well.

I was concerned about the condition of the runners so decided to lightly sand one area on them and see how they turn out. I will also have to buy runner dent removal kit since these have a few dings in them. Here is what the runner turned out like after about 15 minutes of work.

This part of the process is being done with a dremel and stones of various shapes as well as drum rolls. This process is great for removing casting lines and the rough texture of the manifold. At this point once you get the manifold cut down then you can shape and blend areas for a much cleaner look. I don't have a plenum and and fuel rails at this point but will also show you how to do them as well.


This is a different TPI system I did, however it was never completely finished, but you can see how well they will turn out and the cleaner look without the casting "logos" I even do the bottom of the plenum as well because when the base is polished you will see the ugly bottom of the plenum if it isn't done. To me if every spot isn't done on a TPI it will show on other polished parts and thats why I do all four sides of the plenum.


Last edited:


