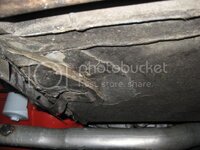
First, just clean the underside of the fender with gasoline, kerosine, lacquer thinner, or acetone to get the undercoating and road grime off. Finish by spraying with starter fluid, throttle body cleaner, or any spray that does not leave residue. Do an area much bigger than your anticipated repair and let the fluids drip into a large cookie sheet or similar. Take the appropriate steps when using these flammable solvents.
Next, grind the front side bondo and cracks completely out to a feather to remove all the bondo and go thru all the cracks. On the cracks you can leave up to 1/8" gap when you grind thru. Use 20, 30 or 40 grit. The more rough the disc the better.
Wipe back side with acetone or laquer thinner or alcohol.
Then get some aluminum duct tape as used for a/c ductwork. The good real stuff is much thicker than the Homey Depot junk.
Using a bondo squeege apply it to the underside of the fender under the repair making sure it is tight. This tape is heavy and sticky enough to form a mold for you. Layer it up on the underside if you want it stiffer and/or thicker.
The using whatever speed epoxy is appropriate for your temperature and epoxy compatable mat, do the outside of the fender first probably in at least 2 layers, not stopping between layers. Important to not let the layers cure or harden.
After the outside has hardened, remove all the a/c tape on the underside.
Then using a small right angled air grinder with the same 20 grit discs, grind the underside of the fender to an area about 1" past the new glass that you put in the front. Light should show thru the new stuff easily to guide you. Then put 1 or 2 layers on the underside, same stuff. Have all your matt cut roughly to size before you mix resin.
After all has cured, you can carefully grind or sand to shape staring with 100 grit to the outside contours and also to shape the underside. Use the color of the original fender to guide how much you sand. Don't sand too deep. Ideally, you want to use NO filler when done, so be carefull with your grinding/sanding. Go up to 320 to prep for primer.
Whether this is SMC (which it is) or not, is a moot point. Epoxy resin is the best to use on any type of glass and has over 10x the adhesion properties of the other kinds of resins. Epoxy is the best to use on ANY composite.
From your pics, it looks like they used bondo instead of glass for strength.
The key to making this a simple job is to use the A/C tape as a mold.
On the bright side, if you screw up, just start over again and grind out your screwups. Glass is very forgiving.
I don't have them handy, but I can post some pics of the tape used as a form etc tomorrow evening.


