Starting my Fiberglass training

Shirley1978

Well-known member
Joined
Jun 5, 2008
Messages
113
Location
California, San Jose
so i went to the auto body supply store today and picked this up

Fiberglass%20Repair%20Kit.jpg


seems pretty straight forward.. im going to try and make a lip or a small spoiler for my car and attach it later, IF it comes out good... i forgot to ask if it was smc compatible, but im not planning on using this on my car just yet.. so i didnt bother returning it..

what do you guys think about the kit? it comes with the following:
-1 quart polyester resin
-fiberglass mat 6 sq ft
-fiberglass cloth tape 3"x 5ft
-11cc tube liquid hardener
-measuring cups
-stir stick
-complete instruction manual

:fishing:
 
The use of glass itself is fairly easy, just follow directions.....I made filler panels for my headlight holes by following some simple suggestions from a friend of mine....thing is the finishing.....that is something I have NO patience with....

:surrender:
 
Not trying to rain on the parade but anyways:

Your rear bumper is urethane, you cannot just add a spoiler by simply 'glueing' it on there with fiberglass or polyester resin. Only the body is SMC and for example UScomposites in south FL makes great epoxy resin than is compatible with SMC. Check out their website, great stuff.

One thing you can do (and that might be a fun project): tape a stock pace car spoiler with masking tape and aluminum foil - do not overlap too much... then apply mat and resin on top of that. Pull that "mold" off the spoiler once it cured. A release agent or wax makes this a lot easier... I have used "PAM" spray in the past and it worked great !!!
Now use the mold that you've got to make a replica pace car spoiler.

OR: make a mold from the entire rear bumper and make your own fiberglass bumper - then add a spoiler to that :thumbs:

Before you start: buy a good respirator - fiberglass dust/particles are not healthy .. you'll be sanding a lot....
 
i didnt specify... i meant a front spoiler... like an air deflector to feed more air to my radiator.. nothin fancy.. i just wana practice.

thanks anyway :hi:
 
O O O P S......


Front spoiler is a "bolt on" so yes, the kit you bought is OK :thumbs:

If you were local I'd show you the "bolt on" Pace Car style front spoiler that F.E. Ecklers sells.... it scoops air and directs it to the radiator.... just like the stock piece, it's 1pc made from fiberglass....
This (again f.e.) Ecklers spoiler requires you to cut the stock spoiler and re-use part of it. you're better off making your own... wish i knew this beck when I bought their spoiler...oh well, live and learn....
 
Gawd, I must be a cheeep bastard or something, but the factory spoiler on my '72 was toast when I got the car long time ago, and so I just took it off, and left it that way for 15+ years well just the other week, I got tired of it looking missing and all, but never wanted anything really solid there to drag the ground and get all busted up in the process.....well.....

I had some black garden edging, they type from Loews Depot, and it was about4" wide or so, I cut off a 6' section then ripped the ribs off on either edge....making a flat piece about 3" wide.....clamped that to the flange on the glass under there, and shoved sheetrock/drywall screws into it for permanent mounting, then shaved the ends round with a knife.....painted it flat black, and

CASE CLOSED......SO FAR it's not dragged any ground but it does look better....:hissyfit:
 
^ i was thinking about doing something like that also, using some wall coving (the black rubber thing along the floor that goes on walls for a better look)

got any pics?
 
^ i was thinking about doing something like that also, using some wall coving (the black rubber thing along the floor that goes on walls for a better look)

got any pics?

Yeh I was thinking of that too, but this stuff for gardens is a bit stiffer, yet I think flexible enough to avoid damage when the inevitable curb/parking/driveway gets to work.....the cove base is a bit too limber I thought....

I have a front shot I just put this AM on the site there listed on bottom of my sig file....look for most recent pix.....lotsa car crap and also other stuff....

:search:
 
Shirley,
this Evercoat kit is not cheap. You are better off practicing with this Bondo brand resin and mat from Auto Zone, it's cheap, less than $15 for a gallon resin and maybe $6 for the mat plus $3 for additional hardener.
Lay a piece of mat on a smooth surface and brush resin on it, just enough so the mat is wet. Lay a second layer of mat and add a little more resin. Buy cheap brushes at HomeDepot, use Acetone to clean tools.
It is fun making your own parts.
 
^ i was thinking about doing something like that also, using some wall coving (the black rubber thing along the floor that goes on walls for a better look)

got any pics?

That's called coving. :hi:Too thin.
 
Shirley,
this Evercoat kit is not cheap. You are better off practicing with this Bondo brand resin and mat from Auto Zone, it's cheap, less than $15 for a gallon resin and maybe $6 for the mat plus $3 for additional hardener.
Lay a piece of mat on a smooth surface and brush resin on it, just enough so the mat is wet. Lay a second layer of mat and add a little more resin. Buy cheap brushes at HomeDepot, use Acetone to clean tools.
It is fun making your own parts.

Ya, buy a bunch of cheap brushes. You'll go through a few each session.

And Mr. Brown, the year is 2009, and a gallon of Bondo resin is about $35. :drink:
 
Of course I meant to say a quart is about $15, it's been a while since I bought resin so maybe it's $20. I'd ne shocked if it's more than 20 for a qt. How much is this Evercoat kit ? $100 ???
 
Of course I meant to say a quart is about $15, it's been a while since I bought resin so maybe it's $20. I'd ne shocked if it's more than 20 for a qt. How much is this Evercoat kit ? $100 ???

About that, over at Boat US.....last winter/spring.....I about shit, as I didn't spend but like 60 bux for like 3 gallons for redoing a small sailboat inner hull but it was like 30 years ago....what happened???:bonkers:

:waxer:
 
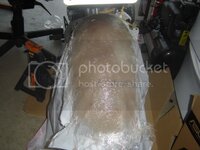
so i finally got around to doing some work. kinda didnt know what i wanted to do first.. :hunter:
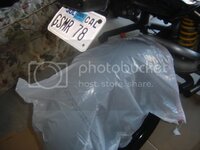
first was the front spoiler, but i was too lazy to take measurments of the car, then i was going to make a lower belly pan for my Monster, but that fell thru since my pipes are kinda in the way. i rememberd that i wanted a rear tire mud gard for a while, so i decided that i would start with that

i used a plastic bag to keep it off the rear tire
DSC02502.jpg
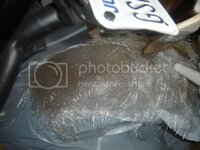
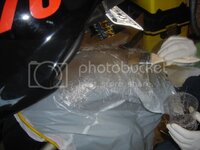
didnt have a large dispensable container for the resin so i just used a plastic cup. didnt really dip the mat, just sorda put a heavy coat of resin on
DSC02503.jpg
DSC02504.jpg

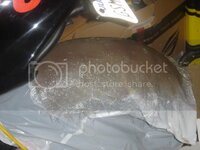
i didnt really keep track of how many layers i put on.. :noob:, but it looked decently even by the time i was done for the day.
DSC02505.jpg
DSC02506.jpg
DSC02507.jpg

im going to let it cure and see what i made 2morro, then at it again with some cloth for strength and alot more mat

so how did i doo?:hi:
 
Looks good so far :1st:

I don't think you have to wait for this to fully cure, you can add another layer or two and then let it cure over night.

Personal preference I guess: I prefer to add a layer of mat last, that can then soak the resin from the previous layer. resin does nothing for strength, use only as much as needed to get the mat (or cloth) wet.
 
i would have added more but it started getting too cold, i wanted to keep going but figured id rather wait untill 2morro or monday.. im just glad i got started already.. been crazy busy with all kinds of stuff lately...

and i added some mat after the last layer of resin, sorda just used my hands to use the resin from the last layer to soak it all in..
 
Last edited:
Top